Growing Giant Dill from Seeds in the UK
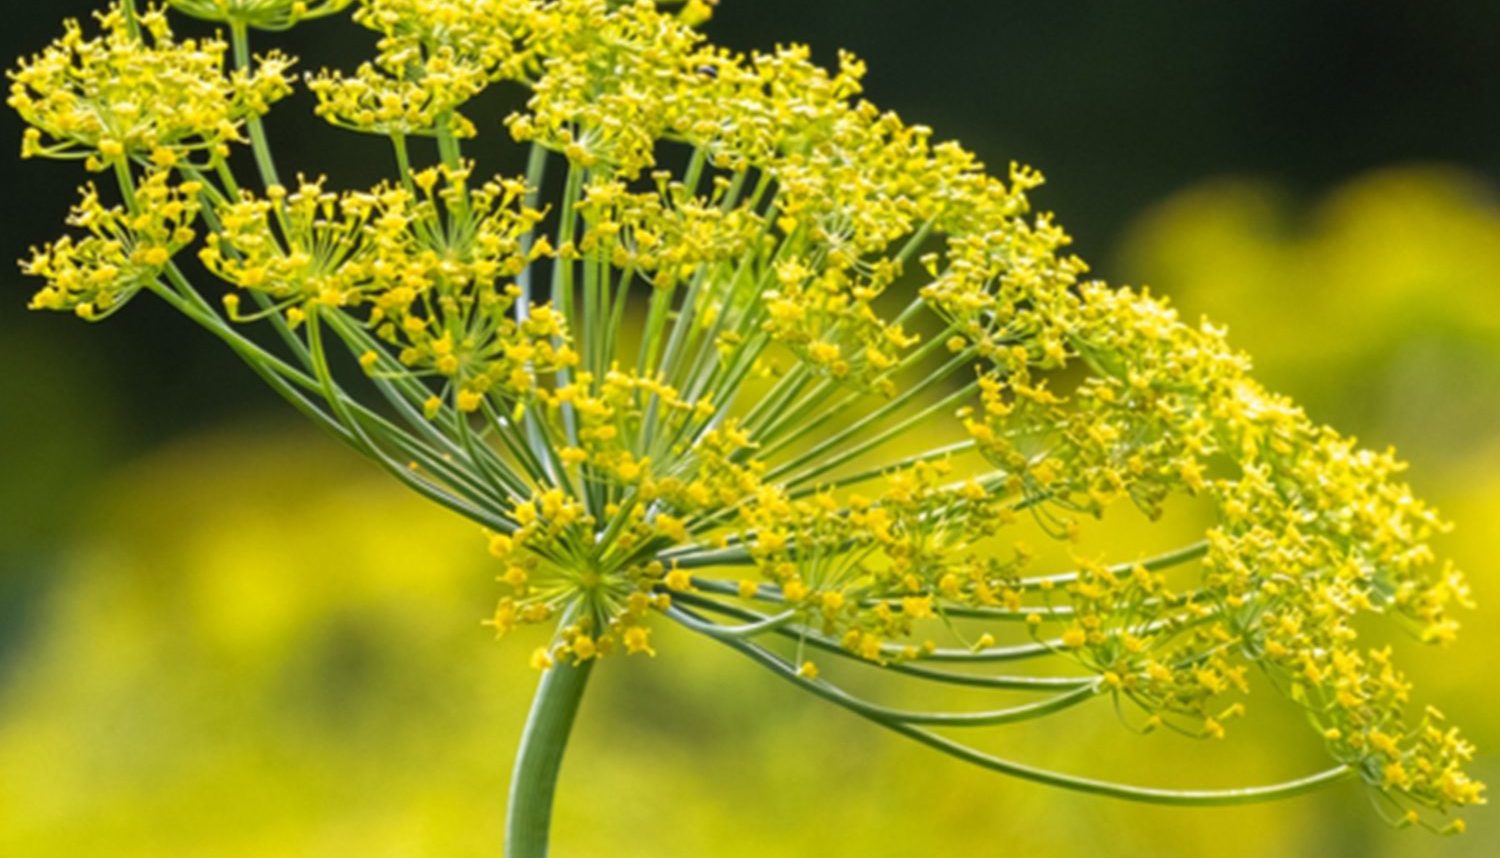
Giant Dill (Anethum graveolens) is a versatile and aromatic herb, known for its feathery blue-green foliage and clusters of delicate yellow flowers. This upright annual is prized for both its leaves and seeds, which are used to flavour a variety of dishes, from fish and eggs to pickles and marinades. Giant Dill not only adds a delightful taste to your kitchen but also serves as an attractive ornamental plant that can enhance vegetable gardens and flower beds while attracting beneficial insects. Follow this comprehensive guide to successfully sow and grow Giant Dill in your UK garden.
When and Where to Sow Giant Dill Seeds
- Outdoor Sowing: Sow seeds directly outdoors from mid-spring to early summer (April to June) once the risk of frost has passed. Dill has a long taproot and does not transplant well, so direct sowing is preferred.
- Indoor Sowing: For an earlier start, sow seeds indoors in pots 4-6 weeks before the last frost. This can be beneficial in cooler regions of the UK to ensure an early and steady supply of dill leaves.
Ideal Growing Conditions for Giant Dill
- Soil Requirements: Dill prefers well-drained, fertile soil. Avoid overly rich soil, as this can lead to excessive foliage growth and less flavourful leaves. Aim for a slightly acidic to neutral soil pH of 6.0-7.0.
- Sunlight: Plant in a sunny location that receives at least 6-8 hours of direct sunlight daily. Dill thrives in full sun and requires ample light to develop its aromatic oils and robust growth.
- Temperature: The ideal temperature for germination is between 15-21°C (60-70°F). Dill is a cool-season herb that performs best in mild, temperate conditions, making it well-suited to the UK climate.
How to Sow Giant Dill Seeds Outdoors
- Preparing the Soil: Choose a well-prepared seed bed in your garden. Remove any weeds and rake the soil to a fine tilth. Incorporate organic matter such as compost to improve soil fertility and drainage.
- Sowing Depth and Spacing: Sow the seeds just beneath the surface, at a depth of 1-2 mm (1/16 to 1/8 inch). Lightly cover the seeds with soil, as dill seeds require light for germination. Space the seeds approximately 15 cm (6 inches) apart in rows spaced 30 cm (12 inches) apart.
- Watering: Water gently after sowing to settle the soil. Keep the soil consistently moist during the germination period, which typically takes 14-21 days. Avoid waterlogging, as this can hinder germination.
- Thinning: Once the seedlings are about 5 cm (2 inches) tall, thin them out to a spacing of 15-20 cm (6-8 inches) apart. Thinned seedlings can be used in salads or as a garnish.
Sowing Giant Dill Seeds Indoors
- Sowing in Pots: Fill small pots with seed compost and sow the seeds on the surface. Lightly press the seeds into the soil and cover with a fine layer of compost or vermiculite.
- Germination Conditions: Place the pots in a bright location, such as a sunny windowsill, and maintain a temperature of 15-21°C (60-70°F). Keep the compost moist but not waterlogged. Germination usually occurs within 14-21 days.
- Transplanting: Once the seedlings are large enough to handle and have developed their first true leaves, transplant them carefully into their final positions in the garden. Handle with care to avoid disturbing the taproot.
Caring for Giant Dill Plants
- Watering: Dill requires consistent moisture, especially during dry spells. Water regularly at the base of the plant to prevent the soil from drying out. Avoid overhead watering to reduce the risk of mildew and other diseases.
- Feeding: Dill is not a heavy feeder, but a light application of balanced fertiliser in the early stages of growth can support healthy foliage development. Avoid excessive nitrogen, which can reduce the aromatic quality of the leaves.
- Supporting: In windy areas, dill may benefit from support to prevent the tall, delicate stems from bending or breaking. Use stakes or plant supports as needed, especially when the plants begin to flower.
Harvesting Giant Dill
- Harvesting Leaves: Begin harvesting the leaves once the plants are about 20-30 cm (8-12 inches) tall. Use sharp scissors to cut the outer leaves, leaving the inner leaves to continue growing. Harvest in the morning when the leaves are freshest and most flavourful.
- Harvesting Seeds: To harvest seeds, allow some flower heads to mature and turn brown. Cut the seed heads and hang them upside down in a paper bag in a cool, well-ventilated area. Once dry, gently rub the seeds to release them and store in airtight containers.
- Storing Leaves: Dill leaves can be used fresh or preserved by freezing. To freeze, chop the leaves and place them in ice cube trays with a little water. Once frozen, transfer the cubes to a freezer bag for later use.
Common Questions About Growing Giant Dill
- Can I grow dill in containers? Yes, dill grows well in containers. Choose a pot at least 30 cm (12 inches) deep to accommodate the taproot, and use a light, well-draining potting mix. Ensure the container is placed in a sunny spot and water regularly.
- Why is my dill plant turning yellow? Yellowing leaves can indicate overwatering, poor drainage, or nutrient deficiencies. Ensure the soil is well-draining and not waterlogged. Feed the plants with a balanced fertiliser if needed.
- Can dill be grown as a perennial? Dill is an annual or biennial in some climates. In the UK, it is typically grown as an annual, as it will flower and set seed within one growing season. However, it can self-seed and return the following year if conditions are suitable.
By following these guidelines, you can enjoy a bountiful harvest of aromatic Giant Dill in your UK garden. Whether used fresh in your favourite recipes or dried for future use, this versatile herb is a must-have for any herb garden.

